Creating a Custom Pop Up Bridge
31 Aug 2016, Posted by in Case Study, Featured
Being a designer is never boring. As long as there are fresh ideas, there will always be a need to challenge yourself and see what you are capable of. When a client approaches you with a crazy concept, you can’t immediately say “no that’s not possible”, because you may never know until you try. Such was the case when a client came to us asking if we knew how to create a pop-up card. The event was a dinner that was celebrating the anniversary of Martin Luther King Jr. walking across the Edmund Pettus Bridge in his famous Selma to Montgomery marches. The concept in question was a card that would include a pop-up of the bridge itself. We had never done a pop-up before but we were confident we could devise something that would make the client and all of those receiving the card, happy.
Our process began with researching other pop-ups. We explored everything from the very basic children’s books to more complex greeting cards that contained famous landmarks in pop-up form. The basic pop-up was always a two dimensional piece that simply stood up when pulled by opposing pieces of paper. The landmark pop-ups we found were three dimensional but were quite complex in how they were put together. Our challenge was to first replicate the bridge itself in 3D paper form, and second to make it simple enough that it could be easily re-produced.
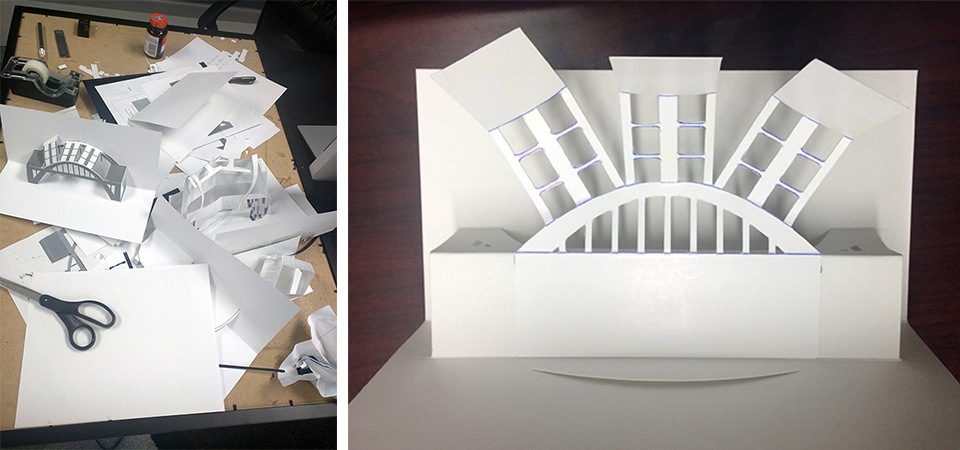
In short, when the card was pulled open, the inner wing wall piece was pulled by the opposing sides, while the lateral struts were pulled out of their pocket. When the card closes, the wing wall piece folds back in, and the lateral struts are pushed back into their pocket. While we would have liked to add more complexity and get closer to the actual bridge shape, we felt good about the piece given the time and labor constraints.
This project encapsulated much of what a designer has to deal with; providing a solution to a new challenge that is practical, artistic, on time, on budget, and fits the vision of your client.
Sorry, the comment form is closed at this time.